experiments
As some readers know, my most recent printworks have been utilizing an inkjet printed clear mylar layer over a print on paper. I’ve expressed some dissatisfaction with the mylar’s shine and reflection. So, I’ve been looking into alternative materials for new work in the same series, and found some sheer polyester organza which I’ve been experimenting with. The fabric is very light and hard to cut square and obviously had to be attached to some support in order to feed it through the wide-format printer. I’ve done several tests:
1. I sprayed repositionable adhesive on fairly sturdy paper. Unfortunately the can was old and the glue sputtered on unevenly. It was difficult to get the sheer cloth on evenly and I got a lot of glue on my fingers. (Use gloves next time!) At the printer, I had a bit of difficulty feeding it in as it has to wrap around the feeding roll, but it did print! RESULT: Most of the ink passed through to the backing paper. Glue bits were stuck on the organza even after lifting it off the paper.
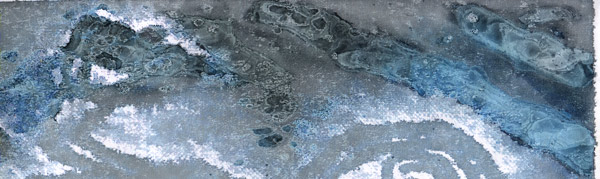
2. A fellow artist offered his poly-coated freezer paper to try out. I ironed the organza to this. To assure the edges stayed stuck I used painters’ green tape over the edges of the organza, gradated to the edge of the freezer paper. This went through the press quite well. RESULT: Like #1, more ink ended up on the backing, but because the coating is non-absorbent the ink pooled in some areas, so I let the ink dry before peeling the fabric off. The printed freezer paper looks pretty interesting, and the blotchy spots did remain on the fabric though faintly.
3. I tried to repeat #2 but this time the paper jammed in the printer heads, because it curls upwards! We do not want to damage the printer-heads!
4. This time I took the freezer paper/organza and taped it to a lightweight art paper. The printer heads did drag over some of the tape.
5. Repeated # 4 using thin transparent tape. This caught on the printer heads too!
CONCLUSION: The freezer paper coating is not strong enough to hold down the cloth against the handling over the feed roller and the vacuum, hence causing the fabric to lift at the tape edges and catch in the printer heads. Goodbye to this technique.
NEXT TESTS: Back to #1 with a fresh new can of repositionable adhesive and using a lighter paper backing. In addition, inkjet vellum is now on order and we’ll see how that works.
I really have to think some more about how to successfully incorporate the image on the organza because it is rather faint. I’ve also been wondering if the polyester fibre is the right choice, silk likely would have been preferable but the store did not have this. I’ve even had a bit of a “chat” with Omega, a new virtual friend and fabric-artist blogger of the fascinating Threading thoughts, who has confirmed this in her own practice.
The above image is an interesting detail of one of the test prints left behind on the freezer paper. (Someone pointed out that this is an inkjet silkscreen print!)
ADDENDUM March 2nd, 2006: Continued in experiments, part 2
February 8, 2006 in Being an Artist, Digital printmaking by Marja-Leena
I’m sorry that your experiments did not work as you would have liked. One thing suddenly occurred to me: in exhibitions I have seen photographs giglee printed on a kind of watercolour paper. Now I don’t know anything about how this is done, but the paper was definitely cold press and not flat flat flat, and the description giglee means it came out of a computer printer. Therefore, I wonder if you used a fine coldpress paper as backing you would be able to absorb the surplus ink, perhaps resulting in interesting usable paper as well as organza -?
Sometimes when our experiments don’t go as we wish, we discover something new. The striking image left behind on your freezer paper may be one such discovery.
Omega, Thanks so much for your imput here and by email! I have done quite a bit of archival inkjet printing, (giclee is a fancy word for that) on fine art papers as well as inkjet art papers. The first test I did was on lower cost art or proofing paper that absorbed the ink and resulted in a print. But I loved the puddles and accidents on the non-absorbent freezer paper, which I scanned and might be able to use for some other projects.
Patry, that is exactly why I love to experiment, even when it can be a frustrating exercise in problem-solving.
So, do you have your own printer and scanner for doing giclees? I am so intrigued with the whole process of them. Right now I get them done by a local print show, they are reproductions of paintings I’ve done…but I’ve heard of other artists with their own printers/scanners who use the new technology to produce what I would consider to be original fine art prints (using your definition) conceived of originally as a print, where they control the amount of ink, the paper, etc. What are your thoughts on that?
Also, if you do have your own equipment, would you mind sharing what brands you own?
Also (last also I swear) thanks for sharing your processes/experiments…even if they didn’t work exactly the way you wanted, so few artists are willing (or thing to) share those kinds of delicious details!
🙂
Thanks Elise, for the excellent questions! I decided to write my answers in another post!